Moving day

For a number of reasons – among them the fact that my husband, the web developer, knows how to do this sort of thing – we’ve moved my blog. Can I get a “huzzah”?

Huzzah!

Thank you. Audience participation in a blog post can be a little rough, but you’ve performed admirably.

So, the new blog. It has a new name, and that name is Two Blue Buttons. If you would be so kind as to update your links and subscriptions to http://twobluebuttons.com, I would be tremendously grateful. After that, you can join me at the new blog for cake (there’s always cake on my blog, isn’t there?).

A funny thing happened

We used to own goldfish. There were two of them, Swimmy and Splashy, and they lived in an old television that we stuffed with a fish tank and placed over our kitchen sink.

I know this because I wrote about them in a poem. I know about the poem because I found it today, while sorting through some of my portfolios from back when I was a creative writing major who wrote poems about things like goldfish.

But here’s the funny thing: neither Mitch nor I remember the goldfish. A dim, blinking light in the back of my memory confirms something about the television fish tank but little about the fish themselves (though presumably, they were gold). I don’t remember feeding them; I’m guessing that they died.

Maybe it’s my impending class reunion, or perhaps the second glass I’ve wine I’m working on now, but I’m a bit sad that we had so completely forgotten that detail about our first years of marriage. What else have we forgotten? I’m sure there are things that didn’t merit a poem that we don’t remember and so don’t miss. (Some of them did get a poem, but I’m still perplexed about the event that inspired it. For example, I found one titled “On the Way to Your Wedding,” but I have no idea whose wedding we were en route to.)

I’ll take a happy stance here, though, and suggest that so many good things have filled our memories over the course of the last eight years that there’s hardly space for remembering two simply named fish. We’ve lived in many small spaces with quirky neighbors and haphazard decor. We’ve made meals, hosted parties, taken up hobbies (and dropped them), lost objects, purchased new ones and seen friendships ebb and flow.

These years have been full, and they have been sweet. If I’m sorry to lose the memory of certain seasons, it’s a comfort to know that the ones I do remember are lovely, and the ones that I’ve forgotten aren’t gone. They may not be tucked away in an accordian file of old poetry, but someone does remember them, and He will remind me of them when they’re needed.

The spell of spring

Things are growing in our yard. We haven’t planted much yet, but there’s something bewitching about the sugar snap peas threading their way up the fence, and our strawberries emerged from hibernation looking perky and alert. A handful of pansies, a rosemary plant, spinach and beets in tiny-leafed infancy: little shoots of things are everywhere, and their exuberance is magnetic. I cannot stay away from the garden.

When transplanting flowers yesterday, I stirred up the soil and found it bursting with earthworms, looking rich and fertile. I may have even used the word “beautiful” while describing dirt.

The spell of spring is upon me.

She makes this face a lot

And she’s eight months old! (Can you believe it?)

Homemade (Almost Dairy-Free) Rainbow Chip Cake

If you haven’t already, you really must meet my friend Ashley. She used to run a dessert catering company, and a few years ago, I got to work for her as a sort of informal apprentice.

This came about almost accidentally, but was a pretty sweet deal (if you’ll pardon the pun), because though I showed up intending to chop chocolate and wash dishes, more often than not she let me do the fun stuff, like pipe polka dots on wedding cakes and liberally sample everything within reach – for educational purposes, of course.
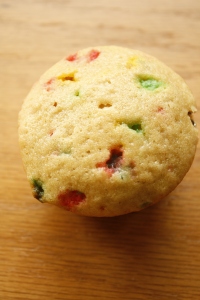
At the time, her eldest son was six or seven months old, and Lydia was at least a year from being born. Since then, Ashley and I have hatched a combined four children, in two rounds of synchronized pregnancies: the first time, we shared a due date. The second time, we were within days of sharing a due date. Both times, the babies came five days apart.

I know, that has nothing to do with Rainbow Chip Cake. But trust me, we’re getting there.

My love of bittersweet chocolate stems directly from Ashley. Her recipe for tart dough is still the one I turn to, and her chocolate chip cookies are the ones that I make every single time I bake cookies. While pregnant with Sarah, I craved Ashley’s salted caramel macarons, which was unfortunate, because by that time she had moved to Seattle and started her blog.

And that, at last, brings me to Rainbow Chip Cake. In honor of her husband’s birthday, Ashley pulled together this incredible recipe, which left me wishing that a) she still lived in my town, and b) my daughter could eat eggs. Nonetheless, the second I saw photos of that cake, I knew that I’d be serving this at my birthday as well as Lydia’s, no matter how much creativity it took to make that happen.
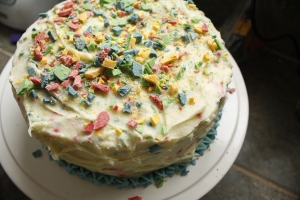
I based my cake upon on the Bittersweet Chocolate Cake recipe, so the cake itself is dairy-free, but because I can’t vouch for the white chocolate chips, I call this Almost Dairy-Free Cake. The frosting is decidedly not dairy free, I’m afraid. But if you can stomach it, it’s incredible – comparable to Ashley’s Cadbury Eggs, really, and not nearly as messy to make.

Homemade (Almost Dairy-Free) Rainbow Chip Cake

For the cake:
3 c. unbleached, all-purpose flour
1/2 c. cake flour (or more all-purpose flour)
2 c. sugar
2 tsp. baking soda
1 tsp. salt
1/2 c. canola oil
2 Tbl. white vinegar
1 Tbl. vanilla extract
2 c. cold water
For the frosting:
3 sticks butter, room temperature
8 oz. cream cheese, also room temperature
4 cups powdered sugar, sifted
1-2 Tbl. heavy cream (or whole milk: I used it, and the frosting was still fabulous)
¼ tsp. salt
1 ½ tsp. vanilla extract

For the rainbow chips:
12 oz. white chocolate, finely chopped
food coloring, in four colors of your choice

First, make the rainbow chips. Over a double-boiler, melt white chocolate. (Alternatively, throw it in the microwave for 20 second increments, stirring well between sessions, until melted and smooth.)

Divide chocolate into four small bowls. Add desired amount of food coloring to each bowl, warming briefly in the microwave if white chocolate begins to stiffen. On a parchment-lined baking sheet, spread white chocolate into rectangles ¼” thick. Chill completely.

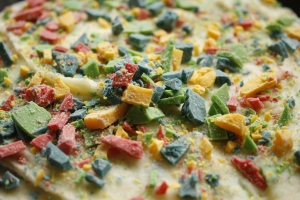
Once cool, chop into pieces approximately ¼” square – though, really, the size is up to you. It’ll be pretty and tasty no matter what. Store these bad boys in a Ziploc bag until you’re ready for them. They’ll be good for a while.

Next, make the cake. Preheat your oven to 350-degrees. Grease two 8” cake pans with butter, and line bottoms with parchment (for the record, I really do think this is worth the trouble).

Whisk dry ingredients together in medium bowl. Measure oil in a liquid measuring cup, then add vinegar and vanilla. Stir to combine.

Add oil mixture to dry ingredients and whisk until the mixture resembles a coarse meal.

Add water and stir vigorously until lumps are mostly gone and the flour is completely incorporated.

Last, but absolutely not least, add ½ c. of the rainbow chips (or more, if you feel so inclined) and stir well.

Pour batter into prepared pans and bake for 30-35 minutes, until cake bounces back nicely when pressed with a fingertip. Cool completely before removing from pan.

Note: This cake keeps beautifully when well-wrapped with Saran wrap, so feel free to make it a day or two ahead and let sit at room temperature. If you’re really ahead of the game, store wrapped cakes in the freezer for a week before using. Let thaw completely before frosting, though.

Now, for the frosting: in the bowl of a stand mixer, cream the butter and cream cheese until smooth. On low speed, add the powdered sugar. As you go, you might give it a taste (as though you needed any extra incentive) – depending on your inclination, you may not want to add the full 4 cups. Remember, the white chocolate will sweeten the frosting, too, so add the sugar to taste.

Next, add the cream (or milk), 1 Tbl. at a time. Add salt, then vanilla, scraping down the sides of the bowl to make sure that all ingredients are fully incorporated.

Finally, add the rainbow chips. Stand back and admire the beauty of your rainbow-studded frosting. Then lick the beaters (it’s in the recipe, so you’re just following instructions, right?).

Now, everyone has their preferred method of frosting cakes, but here’s mine (never mind the photos – I was feeling fancy that day): put the first layer on your favorite cake plate, because you might be like me and find them unbearably fun to collect. Slather on a goodly amount of frosting, ignoring the sides of the cake completely.

Put the next layer on top, making a beautiful frosting sandwich, and top that with another goodly amount of frosting (again, ignoring the sides – I like to let the cake peek through, especially when it’s this pretty). If you have any extra rainbow chips, sprinkle those over the top of the cake.

If you have any extra frosting (which you almost certainly will), put it in a bowl to serve alongside the cake, for those of your guests who don’t mind enduring a self-inflicted sugar coma. They will bless and curse you in the same breath, but they won’t deny that this cake is delicious.
Sprinkles

She considers candied ginger a treat.

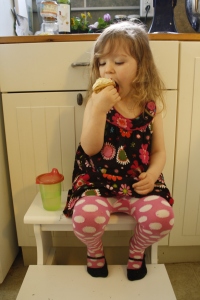
She pilfers her papa’s medium salsa, drinking milk from a sippy cup when it gets too hot.

When offered raw garlic, she asks for seconds.

She eats hummus with a spoon.

And when I asked her what she wanted for her birthday dinner, she chose oatmeal.

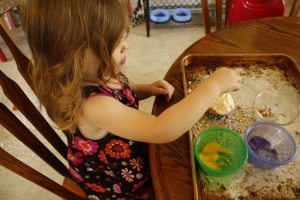
But, like any self-respecting toddler, this girl loves frosting and sprinkles. (I don’t know where she gets it.)

Today, she is three, and I can’t quite believe it. We’ve already taken her new bike for two spins and eaten breakfast at an enchanted cafe and played dress-up for a good portion of the morning, and I wouldn’t have it any other way.

Happy birthday, sweet Lu. I’m so glad that I get to be your mama.

The passage of time

For Lydia, the past tense is encompassed by one broad category: “last year.”

Sometimes, this is a legitimate distinction: for example, “I turned two last year!” Sometimes, it isn’t: she might say, “We went to breakfast last year,” when we all know that she means we went to breakfast this morning.

Certain things that must be learned I take for granted, because I feel now as though I have always known them, and it isn’t until my pint-sized shadow announces that “a bird flew by the window last year” that it hits me: Lydia doesn’t know the shape of the calendar.

She’s only beginning to understand – much to her disappointment – that she’ll never be a baby again, and that she will always be older than Sarah. When I tell her that her birthday is on May 11th, that’s a simple fact, unattached to the understanding that those words function like an address. They tell us where her birthday fits into the year.

As lovely as it must be to have little concept of time, I came up with this idea for teaching her about the flow of months and years and seasons.

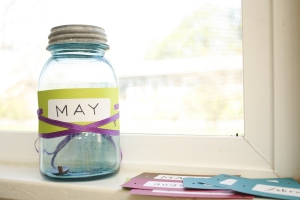
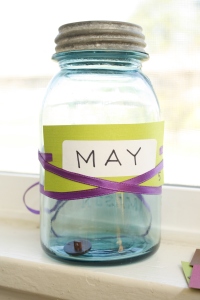
The idea is simple: every morning, we put a button into the jar. At the end of the month, we empty it out, count the buttons and put next month’s name on the front of the jar. We begin again.

The construction is simple as well, and you can tune it to your family’s needs. I wrote the month names out in letters large enough for Lydia to read and, as an afterthought, numbered each month, but you could use different colored paper for each season if you want to (by the time I thought to do that, it was too late.)

Jar of Days

You will need:

  • blank mailing labels
  • card stock
  • one ribbon
  • hole punch
  • a pen
  • a Mason jar (I used a quart-sized jar)
  • 31 small objects. We’re using buttons for this month, but dried pasta or beans would work, too, as would large beads, rocks, or origami boxes (if you happened to go on a memorable origami binge a few years ago, and still find yourself with a surplus of boxes). You could also number some squares of cardstock and reuse those each month. Lastly, I know I don’t need to say this, but I will: don’t let your child play with these unsupervised if you use something small enough to be a choking hazard.

Now, this next part is really easy. Ready? Write “May” and/or the number 5 on a mailing label. Stick it to the card stock and trim card stock to your desired size.

Punch holes on either size of the mailing label and thread ribbon through the holes. Tie label to a jar and drop some stuff in it!

Repeat for remaining months, and stash those in an envelope for later.

[This post is a part of Works for Me Wednesday]

The bad man in the tulips

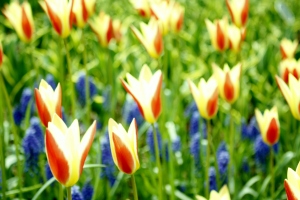
Tulips are kind of a big deal around here. Every spring, we celebrate them with a tulip festival, so you can meander through fields of tulips, take pictures of your kids meandering through fields of tulips and get in the way while other people take pictures of tulips, all while munching on kettle corn. It’s pretty great.

But if you think this sounds silly, think about it for a minute longer: tulips are beautiful, no? In fact, they’re outrageously, vibrantly beautiful. And fields upon fields of them is such a stunning sight that a few neighboring companies offer “Tulip Tours” via helicopter or airplane. But in case you get the idea that you can just wander up and down the rows of flowers, let me warn you: it’s strictly verboten.

I always thought it was because, you know, flowers are fragile and kids playing hide-and-seek among those delicate stems would really bring down the “stunning” factor (and thus, the cost of admission), but, when my dad, step-mom, myself and the girls went to the fields, my dad overheard a mother telling her children an entirely different story:

“Don’t go in the fields, kids,” she said, “because there’s a bad man who lives in there, and he’ll jump out and grab you when you touch the tulips.”

And so those children embarked upon their struggle with a crippling phobia of tulips – beautiful, blood red tulips.

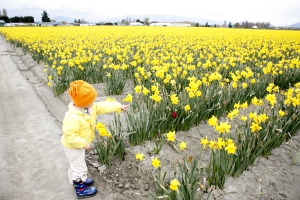
And yes, I realize that those are daffodils.

(On a side note, who gets to name the tulips? And can I please do it, please? My personal favorite was the “Kung Fu” tulip, though it was closely followed by “Ninja.” I didn’t come across a “Chuck Norris” tulip, though that doesn’t mean that it’s not out there. I haven’t given up hope.)

Cherry Branch Hat (Free Knitting Pattern)

Note: My blog moved, and this pattern traveled with it! All updates to this pattern will be available at my new blog, Two Blue Buttons. Please take a minute to update your links and enjoy the new site. Thank you!

Remember the knitting pattern I’ve been writing? The one for the beautiful blanket that I’ve been diligently working on for months? Well, the blanket is done, the pattern needs proof-reading and photographs are forthcoming, so in the meantime, I decided to try my hand at a simpler pattern. (Because heaven forbid I should start with a simple pattern in the first place.)

This pattern is so simple, in fact, that even if you’ve never knit a hat before, you could try your hand at this one – not least because you know exactly where to bring your questions. (If you do try it, please let me know how it goes! I would love to see photos.)


Cherry Branch Hat

This is one of the most basic hats you will ever knit, but because it’s so simple, the pattern is incredibly versatile. I love to embellish these hats with all manner of embroidery, buttons, and felt details (I’ve already knit half a dozen), but I’m sure you’ll find your own way to fancy these up.

Another big advantage to this hat is the rolled brim: you’ll notice that the sizes are pretty broad, and that’s because the rolled brim allows the hat to grow with your child. The toddler size is a little loose on my 7 month old and a little snug on my (almost) 3 year old, so rest assured that you’ll get a lot of mileage out of a single hat.

One final note: this hat is not machine washable. The yarn specified is wool, and if you use wool felt for the details, you will definitely not want to put it in the washing machine. If that’s a problem for you, there are several superwash wool and wool/cotton blends available that would work just as well for this pattern (try Cascade or Mission Falls for some great superwash options).

Materials
Stitch Nation Bamboo Ewe (55% Bamboo/45% Wool), 1 skein Sprout
US 8 circular needles (16” length), or size needed to obtain gauge
US 8 double-pointed needles (set of 4), or size needed to obtain gauge
Scrap yarn, embroidery thread and a small amount of wool felt, in desired colors
Tapestry needle
Embroidery needle
Stitch marker

Gauge
16 sts and 21 rows = 4”

Size
Instructions are written for Baby (Toddler).
Circumference: 16 (17½)”
Height: 7 ½ (8 ½)”

Abbreviations
CO = cast on
k2tog = knit two stitches together

Pattern
CO 60 (70) stitches. Taking care not to twist the stitches, join into a round and place marker at the beginning of the round.

Knit in the round until hat measures 4.5″ (5.5″ for large).

Begin decreasing as follows, switching to double-pointed needles when the stitches are too tight to knit comfortably.

First decrease round: *k8, k2tog* Repeat to end.
Round 2: Knit.
Round 3: *k7, k2tog* Repeat to end.
Round 4: Knit.
Round 5: *k6, k2tog* Repeat to end.
Round 6: Knit.
Round 7: *k5, k2tog* Repeat to end.
Round 8: Knit.
Round 9: *k4, k2tog* Repeat to end.
Round 10: Knit.
Round 11: *k3, k2tog* Repeat to end.
Round 12: *k2, k2tog* Repeat to end.
Round 13: *k1, k2tog* Repeat to end.
Final round: *ktog* Repeat to end. You now have 6 (7) stitches remaining on your needle. Cut yarn, leaving 6″ tail; pull it through remaining stitches and weave in ends.

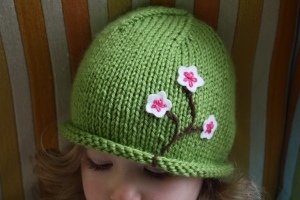
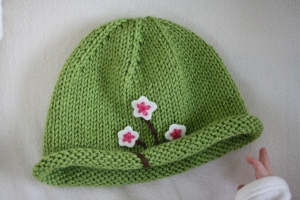
Using a small amount of scrap yarn, embroider the branch in the outline stitch. Because you’re paying homage to nature here, I find it looks much more realistic to free hand the branch design (as opposed to drawing it on the hat beforehand).

Cut flowers out of felt (with these, I find it helpful to either draw a pattern onto scrap paper, then pin it into place on the felt and cut around it, or use a quilter’s pencil to draw a template directly onto the felt).With your embroidery thread, use the daisy stitch to attach flowers to the hat. Knot thread and weave ends into the underside of the embroidery.